Can we even BEGIN to tell you how excited we are for our friends’ first child, Baby E. to be born?!?! No, we can’t! We knew that we wanted to make him something special and something that would be useful, functional, and last for a long time. What could we make? How about a toy box! Not the plastic and bright kind that I have in my basement but something that could go in any room and, hopefully, be useful beyond the years when bright colored plastics are the norm.
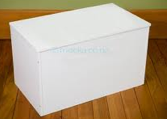
Molly and I found a cool cabinet at the Habitat for Humanity ReStore (Have we mentioned how much we love them there?) and planned on using it but had some reservations. After a few days we found a neighbor who had a plain white, laminated fiber-board toy box but didn’t want it any more. Perfect! What we loved about this is that it already had child-friendly hinges so the lid doesn’t fall down and smash little fingers. The size was (obviously) perfect since it was meant to be a toy box. Also there was some ink and paint on it that we were able to clean off. Since we intended to cover it with wood pieces we liked the simplicity and the fact that it was very square and without embellishments beyond one beveled edge on the front of the lid.
Unloved
What we used:
1–the toy box
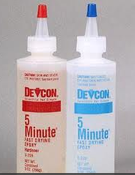
2–5-minute epoxy
3–pine paneling
4–stain
5–wood putty
6–sandpaper
5–paint
6–furniture nails
7–painter’s tape
8–drill
9–saw
10–decorative trim piece
11-clamps
What we thought:
We knew this was going to be a toy box. We wanted to create something that could fit in to almost any room as a piece of furniture and maybe even function as a coffee table or storage for blankets, etc., later on.
What we did:
The first thing we did was remove all the hardware (I like to store it in labeled zippered sandwich bags so I don’t lose it) and clean the piece to get a good work surface. Then we primed it.
Once the primer was dry (it took several coats) we began to plan the application of the wood paneling. We liked the panels we chose because they can be stained, they were perfectly sized to cut down easily, and they would be easy to adhere to the outside of the toy box.
As my grandfather (who is a carpenter) always says, “Measure twice and cut once.” If you are using repurposed materials this is especially true as you cannot replicate those if they are damaged. We purchased wood slats, laid them out for placement, and then labeled them with numbers so they’d go back on in the same order. That’s a helpful trick in case you are ever applying something and the original item is not totally squared or the same length all the way around. Here are the wood pieces we used…because this is for a child we wanted to make sure nothing we were using might have lead-based paint or other contaminants we didn’t know about. I’ve worked with these before and that was a large part of our decision.
Because of the type of material on the existing toy box we used 5-minute epoxy to attach the wood pieces. If you ever work with these pieces it is easy for the wood to split on the tops and bottoms because of the V-connection that is used. Before you attach them, check your package to make sure that the pieces are in good shape. If you are working with 5-minute epoxy read the instructions as it can be a disaster if you do not mix it and apply it correctly. It is also difficult to sand off if you get it on a project that is wood…so be careful in your application. Also, be SURE you have a well-ventilated area.
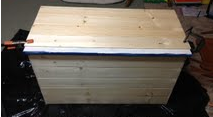
Once the wood was laid out, cut, and ready to go it was just a slow process of attaching each piece. I applied up to 5 pieces at a time depending on how quickly my epoxy was drying that day. Once the pieces were attached I used solid heavy wood to make sure that each piece of wood would have equal pressure when I clamped the wood down. After it was clamped I added additional pieces of wood on top just for weight and to be “safe” that the pieces would adhere without warping or raising. (The picture below is slightly out of order in the process..but you get the idea!)
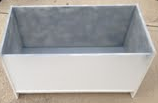
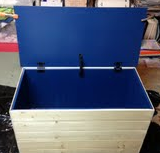
Once all the wood was attached I sanded each side to make sure there were no rough spots or splinters. Then, it was time to start painting. We got the leftover paint from our friends and used it to paint the inside. This way it was somewhat personalized to match his room but the color could easily be changed in the future. When the paint dried we attached the hardware so that we could make sure it all still worked okay.
After all the regular wood siding pieces were attached I attached the decorative trim pieces. I also sanded the top corners to an angle so there wasn’t a sharp corner that Baby E. might fall on. I used some wood putty to fill in the small gap on each corner. I also added furniture nails to the top and sides to get a little bit of that “travel trunk” kind of feel. I pre-drilled holes, then dipped each nail in 5-minute epoxy before inserting them…this way it will be REALLY hard for those to ever come out.
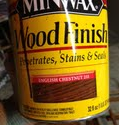
After the paint came the stain! Baby E’s room has a real nice reddish-colored dark stain on the furniture and their family room has soft-colored walls and beautiful dark-brown furniture. We wanted a stain color that could go well with dark furniture but not become something that would “suck” the light. Instead of doing something really dark, we chose a medium shade. It looks dark on the can picture but it didn’t come out quite as dark so we liked that.
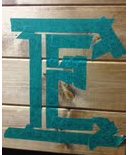
So, the wood was attached, the paint was dry and the stain was dry. Now came one last piece of personalization. We chose a font style that we liked and then created our own stencil using painter’s tape. We wanted to feel like his initial had been stamped on not necessarily perfectly painted and we like the result.
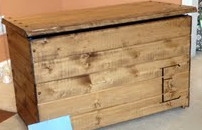
Finally we were done! We learned a lot of lessons from this project but we are definitely proud of our end result!
New View



Jenn and I can’t begin to thank you for this awesome gift! It was so cool to be able to read about all of your labor and time that went in to making our baby boy something that he will have for his entire life; and knowing great friends made it makes it all the more special. Thank you again!